Apple is giving iMessage a big upgrade with iOS 13, the company announced today at its Worldwide Developer Conference. At last, it will offer a way to get rid of those annoying gray initials that appear when someone isn’t in your Contacts with a photo you’ve uploaded. Instead, users will be able to add their own profile photo that will display when they’re messaging others via iMessage. This image can be a real photo of you or just your Memoji — which has also been given an update today.
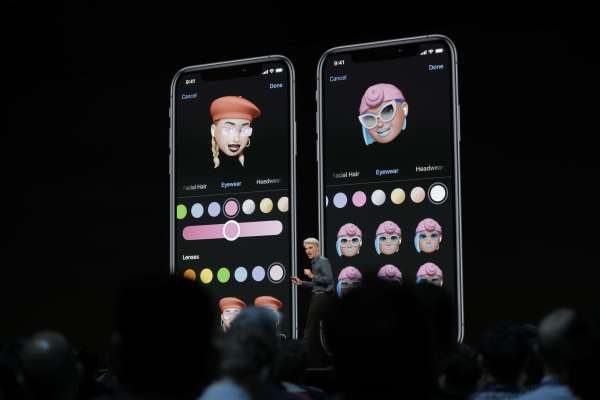
While you could already adjust your Memoji to look like you by changing things like skin tone, hair color, eyes and more, you’ll now be able to add makeup and accessories, as well. That means you can pick different eyeshadows or lip color, or add accessories to your face like piercings — or even add Apple’s AirPods in your ears.
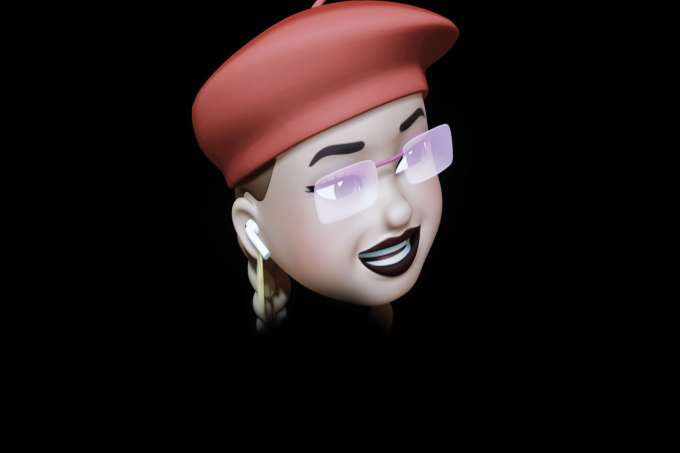
Demoed on stage were things like lip piercings, tongue ring, ear and nose rings, as well as braces, earrings, and other minor upgrades like a gap tooth, gold tooth, and new hair and hat options. Apple picked a couple of beauty influencers to show off the new Memoji during the event.

The update makes iMessage feel more like a proper messaging app, like Messenger or WhatsApp, for example.
In a later demo related to the new iPadOS, we noticed the new iMessage profile photos and Memoji would display in Apple’s Share Sheet, as well.
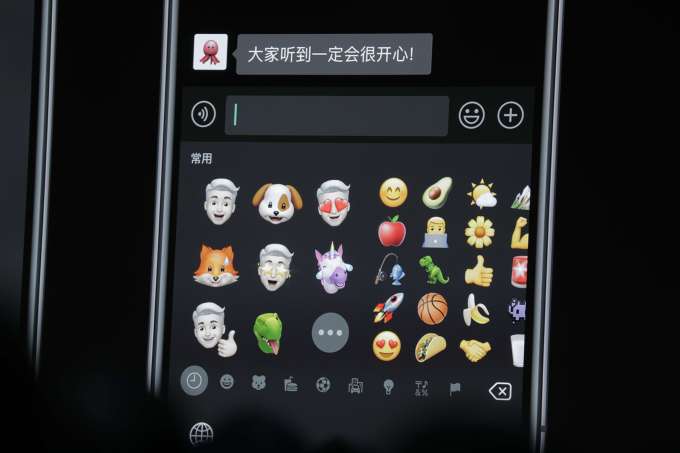
In addition, Memoji can now be delivered to others as a sticker with iOS 13. (See photo below).
Personalized emoji, like the Bitmoji found in Snapchat, have become a popular form of self-expression today. Ahead of Apple’s keynote this morning, Facebook also announced its own version of Bitmoji, called Avatars. These launched today in Australia for use in Messenger and News Feed comments, and will later roll out worldwide.
These changes to iMessage will ship with iOS 13, which is typically released to the public in the fall.
Update: Apple later released a Memoji Makeup tutorial video, below —
