What does the launch of Facebook Timeline for Pages mean for your brand? Unprecedented control, an opportunity to boost engagement, but also lots of initial work. A host of new features became available this morning when Facebook gave all Pages around the globe the option to upgrade to the Timeline redesign. Here’s how they work, and how to use them to benefit your business.
Activating Timeline
First, visit the Timeline for Pages preview manager and select to add Timeline to your Pages. You’ll then enter a curation period where only your Page’s admins can see Timeline, while everyone else including your fans will see the old design. Walk yourself through the features detailed below, and when you’re ready, click the “Publish Now” button atop your Page to start showing off Timeline to everyone. You can upgrade anytime until March 30th, 2012, at which Timeline will automatically become publicly visible for all of your Pages.
Cover
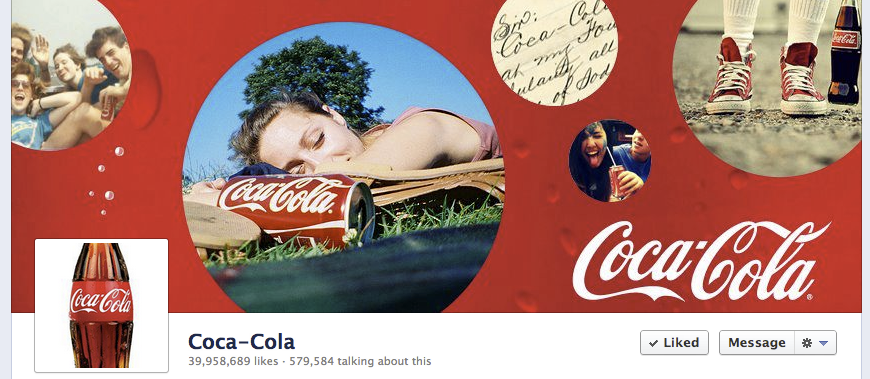
The Timeline cover displays a giant 851 x 315 pixel banner across the top of your Page. Facebook’s Product Director of Ads Gokul Rajaram tells me its “goal is to symbolize what an organization is all about. For a restaurant it could be a popular menu item, a band could display album cover art, and a business could show a picture of their customers using their product.”
Covers may not display calls to action or references to Facebook features such as “Like this Page”, purchase or pricing info such as “40% off” or “Download at our website”, or contact information such as web address. Rajaram says “brands have been very positive [about the restrictions] because they don’t want to be seen as overly promotional — it’s a turnoff. Pick a visually stunning, high-resolution image that will delight or intrigue visitors and make them want to scroll down to your updates.
About Section
Below the Cover is your Page’s standard profile picture, name, and two stats: your total Likes and the number of “people talking about this”. The About section shows a description for brands or an address and contact info for local businesses. Users can click through the About link to unfold a map and view other basic info. Be sure to fill out a short, punchy description of your brand’s identity.
Page Apps
The redesign of how Page apps are displayed could be the primary disadvantage of Timeline for Pages. Apps have been relocated from the left navigation sidebar to the right side of the About section. While they appear with thumbnail photos instead of as text links, they’re overshadowed by the massive cover above. There are four app tiles above the fold, and the first is permanently occupied by Photos. The rest can include Likes, Videos, Events, Map and a Page’s custom apps.
Previously, Pages could set a default landing tab that all non-fans would first see instead of the wall when they visited a Page. This is no longer allowed. Instead, users always see the main Timeline view and have to actively click through to custom apps. This means custom apps for your contests, promotions, games, media, coupons, and signup widgets may receive much less engagement from users who find their way to your Page.
Pages also often used “Like-gates” on their default landing app, requiring users to Like a Page in exchange for the ability to use the app. While Like-gates are still permitted, they’re not nearly as powerful since they won’t be the first thing users see when they visit a page.
To edit which apps you display, click the drop-down icon to the right of the tiles, click the ‘+’ button to import your custom apps, and then hover over them and click the pencil to swap them around. I recommend putting the native or custom apps most crucial to your business above the fold, so coupons for ecommerce brands, contests for consumer packaged good companies, events for promoters, etc. Only display the Likes panel if you have a lot of them and want to peer pressure new visitors into Liking your Page.
Messages
By default, Page Timelines allow users to send direct, private messages to your Page. This creates a new customer service channel where you can address users’ concerns without having to discuss issues publicly on your Page’s wall / Timeline. Pages cannot proactively send messages, you can only respond to users that have already contacted you.
Since asynchronous customer service through messages is much cheaper than fielding live voice calls, Page messages could create additional ROI if you convince users to message instead of calling. If you find users complaining publicly on your wall, kindly ask them to message you instead and say you’ll resolve their problems there. You’ll need to consistently monitor and respond to messages though, or you’ll risk being perceived as ignoring your fans.
Highlights Feed
When users visit your Page, they’ll see a mix of stories published by your Page itself, by their friends, and stories from other users that have received a lot of Likes, comments, and shares. This is much different than the dedicated Page-only and other users-only feeds from before Timeline. Users can opt to visit those dedicated feeds, though. A Timeline navigation bar on the left lets users jump to different years in a brand’s history.
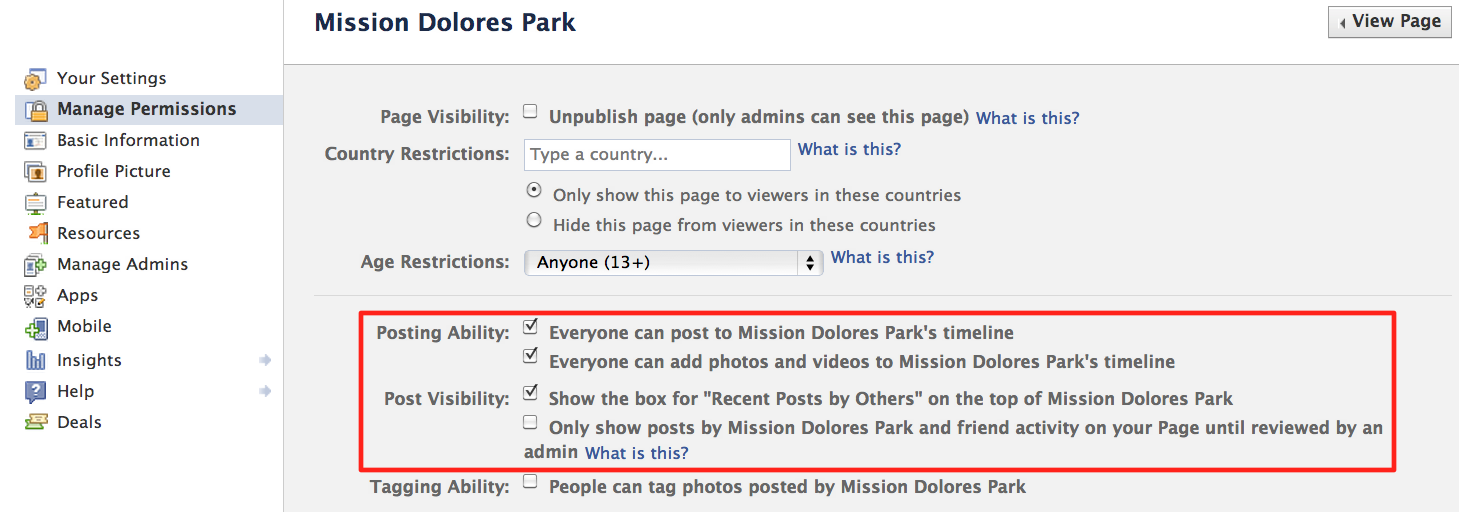
Since random user posts that aren’t necessarily positive could appear on Timeline, the Highlights feed presents branding risks. Thankfully, you can disable the ability for random users to post directly to your Page, and prevent their Timeline from displaying mentions of your Page. However, posts to or mentioning your Page by a visitor’s friends are always visible. If you see negative posts, hover over them and select to hide them, or delete them if they’re especially inflammatory or blatant trolling.
Pinned Posts
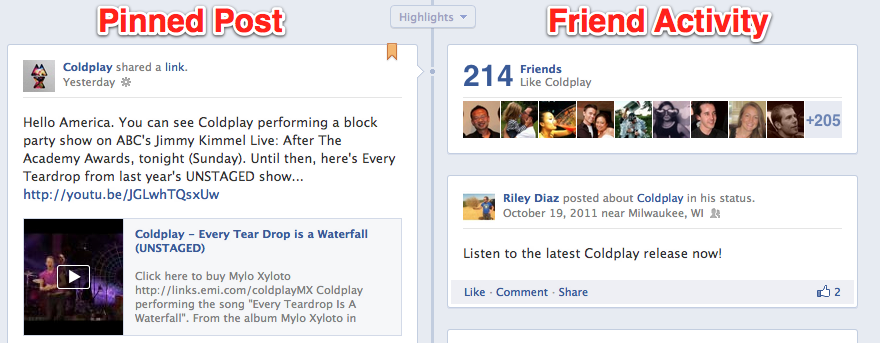
You can select to pin one of your best new or old posts to the top left spot of the Timeline feed for seven days at a time. Pinning can be used to direct users to an important promotional app, show off a special photo, or display a timely status update. The feature gives you significant control what visitors to a Page see first. Be sure to at least keep a link to your website pinned at all times, and rotate it with links to your apps and whatever else you want to drive the most traffic to or impressions of.
Beyond pinning posts, you can select to Highlight important posts throughout their Timeline to make them appear the full width of the Page. Ideally before you publish Timeline, or at least at some point you should crawl through your entire Timeline and Highlight all your best photos and links that are still relevant, and hide or delete posts that seem dumb or embarrassing in retrospect, have broken links, or were timely when published but no longer make sense. You should also Highlight user posts that especially positive, while hiding negative ones.
Friend Activity
In the top right of a Page’s Timeline’s feed, visitors see the count and faces of friends who Like your Page, followed by one update from a friend mentioning the Page that Facebook’s algorithms deem especially engaging. You have little control over this section. Keep it from amplifying negative mentions of your Page by hiding or deleting those posts when first published.
Composer
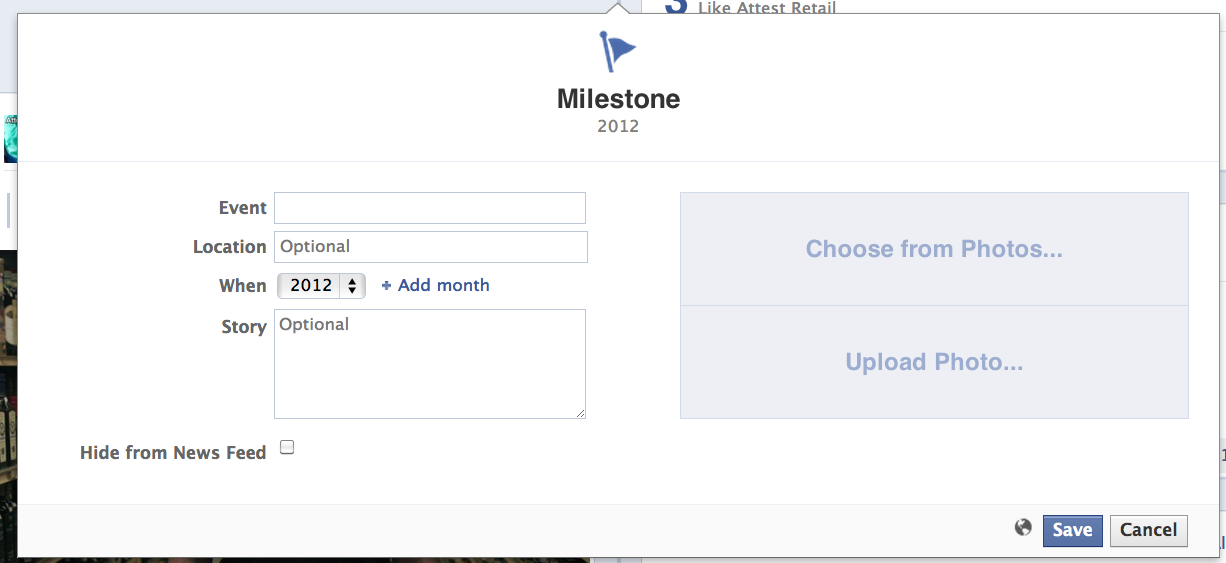
In addition to traditional status, photo, video, and question updates, you can select to publish special Milestone stories, such as your founding date, and other big accomplishments like acquisitions or hitting a notable number of customers. These updates are likely favored by the EdgeRank news feed visibility algorithm, and may receive more impressions in the news feed and more prominence on Timeline than standard posts. Milestones appear full-width on your Page with a special flag icon on top. Don’t be afraid to use them whenever somewhat appropriate. Users also see the standard composer, sans Milestones, and can use it to publish feedback publicly to your Page.
Admin Panel
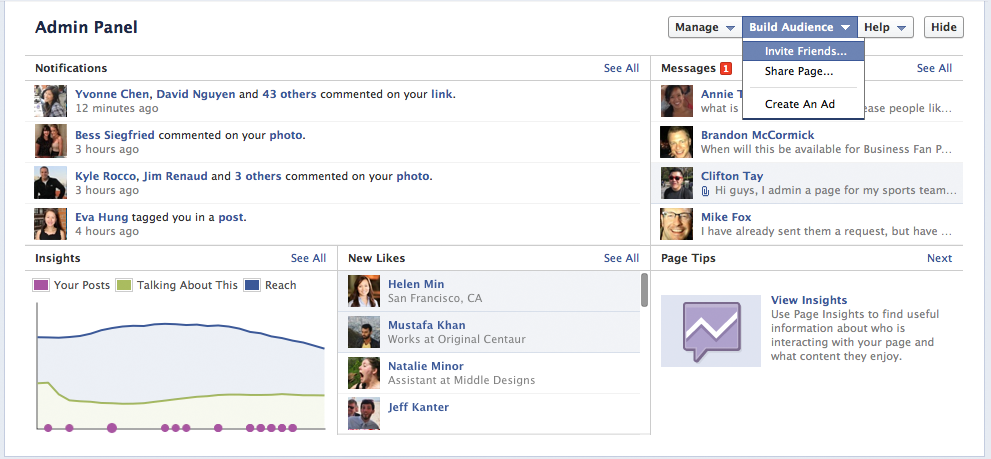
Rather than sending admins to a separate interface, the new Admin Panel drops down and appears overlaid over Timeline when clicked. It displays notifications of recent activity such as posts to your Timeline by fans, a list of your most recent Page Message conversations, new Likes, and a snapshot of your Insights data including the volume of your own posts, total reach, and the number of “people talking about this”. Each section can be drilled into for a more detailed look. A “Manage” button on the Admin Panel reveals the “Edit Page” option where you can configure all your Page’s settings including whether fans can post to your Timeline and who can see those posts.
Activity Log
Here you can see every post your Page has ever published, as well as all those by users mentioning them. You can highlight posts to expand them to the full width of you Page, allow them to appear if Facebook deems them relevant, or hide them from view. Posts written directly on your Page’s Timeline may also be deleted. Activity Log makes it easy for you to curate your Timeline and make sure you’re putting your best foot forward.
In summary, here’s a checklist of the most important things to do with your Timeline
- Choose a beautiful cover
- Provide a punchy description
- Feature your most important apps
- Pin the post you want to drive the most traffic to
- Highlight great historical posts by you and your fans
- Hide or delete embarrassing, out of date, or negative posts by you and your fans
For more information, watch the Facebook Timeline for Pages intro video and read the product guide.
Check out the rest of our Facebook Marketing Conference coverage:
Facebook Opens Timeline To All Biz Pages, Mandatory After 30 Days Of Curation
Facebook Timeline For Pages Kills Crucial Marketing Feature: Default Landing Tabs
Liveblogging Facebook’s Marketing Keynote With Sheryl Sandberg
Facebook Reveals Mobile News Feed Ads and Massive Logout Page Ads
Business Data Reporting In 5-10 Minutes, Not Days. Facebook Rolls Out Real-Time Insights
