Pokémon Go is officially the biggest mobile game of all time — at this point, you’re either playing or you’re sick of hearing about it. If you’re in that first camp, keep reading. We are only a week in and several members of the TechCrunch team are level 20 or higher. We have put a ton of mileage into the game. Hundreds of miles in fact. And here’s what we think are the best tips to help you become a Pokémon Master in no time.
Tip #1: Tracking 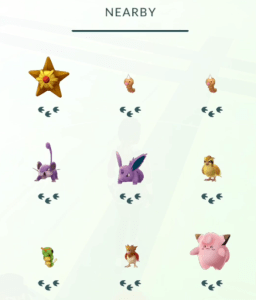
Let’s start first with hunting down and catching stuff. DON’T JUST WALK AIMLESSLY! When you tap on the bottom right, you’ll pull up the “Nearby” drawer. The footprints beneath Pokémon are a rough indication of how far away they are. The drawer is sorted by distance, and it’ll update as you walk around. Tapping a Pokémon focuses in on it. Each claw represents roughly a 100 meter distance. If you drop down from three prints to two, you should feel pretty confident that you’re headed in the right direction.
Tip #2: Improve your odds
When catching Pokémon, look at the colored circle that appears when you’re throwing. Green means easy; red means hard. See how the circle shrinks over and over? The smaller it is, the better your odds are of making a catch. But, you only get that odds bonus if the ball lands INSIDE the colored circle.

Tip #3: Be better at battle
When entering a gym battle, swipe from right to left to see what you’re up against — then pick your Pokémon based on what you’re about to fight. The game offers up what it thinks might work, but it’s often wrong. Click the suggested Pokémon to swap them out, and order them based on what you’re about to fight. Fighting a Fire Pokemon first? Throw your strongest Water Pokémon at it right off the bat.
[gallery ids="1354009,1354006,1354007,1354010,1354005,1354015,1354014"]
Speaking of battle, when the little blue bars in the upper left fills up, you can hold down on the screen to unleash a special attack. Watch for yellow flashes around the edge of the screen during a battle. When these occur, your opponent is about to deal damage — this is when you want to dodge by swiping the screen. Practice on the weakest gym you can find to get the timing down.
Tip #4: Catching the good stuff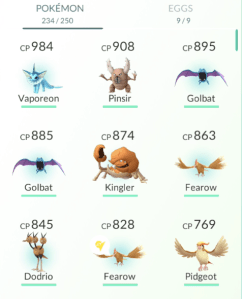
Ultimately, you want a bunch of Pokémon of varying types with high “CP”, or combat power. The higher your own level, the more high powered Pokémon you’ll encounter. Even if you and your friend click the same Pokémon, each of you might see a Pokémon with a different CP count. You’ll still find plenty of weak ones even at higher levels, but the potential cap gets better as you do.
There’s a strategy to storage and everyone’s seems to differ slightly. Generally, it makes sense to transfer low CP Pokémon to the Professor to earn candy for power ups and to evolve high CP. Holding on to high CP duplicates of both rare or easy to find Pokemon helps you level up and evolve more powerful fighters.
Tip #5: Power leveling
Want to level faster? Use those Lucky Eggs you pick up in the most efficient way by batching your evolutions. You get 500 XP every time you evolve a Pokemon, even if you’ve evolved that Pokemon before. You get even more if it’s a new addition to your Pokedex. Pidgies and Wheedles are the easiest to evolve — so don’t pass them up! Gather a ton of them, fire off a lucky egg, evolve them all rapid fire, and drown in that super sweet XP.
Tip #6: Hatching eggs matter!
 You’ll collect hatchable eggs at Poke Stops. Make sure to always have one or more in an incubator — as you walk, they get closer to hatching. Use your one “Infinite” incubator to hatch 2km eggs, since you’ll inherently hatch more of those. You might want to wait to hatch 10km eggs until you’re at least level 18; those eggs have the potential to hatch rare Pokemon and you want your rare stuff to start out strong so you don’t waste candy powering them up.
Tip #7: Reset the game
This game has a ton of bugs. Even if it hasn’t crashed recently, you want to restart it every once in awhile. Pokémon can get stuck on the “Nearby” radar when they’re not actually there anymore. So if you’ve been chasing one for ages and you’re not getting any closer, try rebooting.
Tip #8: Turn AR off
Once you’re over the whole AR thing, you can turn AR off with the switch in the upper right. This makes it easier to aim.
Tip #9: Grab and go
You can tap on the X at Poke Stops to grab all the items — you don’t have to tap each one.
Tip #10: Play in wildly different places
Different cities, even. Stuff that’s rare in Oakland might be common in San Francisco, and vice versa. Try hitting parks, lakes, and other places with unique terrain. You know you’re in a good spot when you see a bunch of other players with lures set up on the Poke Stops.
And as a bonus tip:
If you’re getting really intense, research how to use Niantic’s other game, Ingress, to plan ahead before you leave the house. Done properly, you can use Ingress to find Pokestops that are close together and where spawns are likely to occur.
 That’s it! Happy hunting!