
Editor’s Note: Brenden Mulligan is a co-founder and designer at Cluster, and previously created Onesheet, MorningPics, ArtistData, and others. This is the second part of a three-part series on how we run live user testing at Cluster. After months of constant iteration, we’ve paused to focus on testing before the next release of our iOS and Android apps. Follow us on Twitter at @cluster.
In Part 1 of this series, I wrote about getting user tests set up, which includes deciding on a specific thing to test, deciding when and where to conduct the user study, deciding what type of users to study, recruiting participants with Craigslist, trimming the candidates list, prioritizing and scheduling candidates, and getting the right equipment.
This post will focus on actually running the tests. Part 3 will explain how to take the information gathered and parse it with your team in a meaningful way.
Again, I want to give a huge amount of thanks to Michael Margolis and the Google Ventures design team who taught us most of these techniques.
Running The Tests
The day has arrived and it’s time to actually show the participants what you’ve been building. I’m going to break this into the following sections:
- Arranging the room
- Meeting and prepping the participant
- Introducing what the test is about
- Not answering questions
- Simulating the discovery and installation
- In the prototype: Pre-registration
- In the prototype: Registration
- In the prototype: First user experience
- Wrapping up
It’s exciting, but will be a pretty exhausting day, so get plenty of sleep before and arrive at your testing site at least an hour in advance of your first interview to get set up.
Arranging the room
I like to arrange the seating so the participant and I are sitting by the corner of a square table, or at the 12 o’clock and 3 o’clock position of a round table. Set your computer up in front of you, and the camera facing directly down in front of the participant. It makes the conversation feel a little more natural, but they can’t see what’s going on on my computer.
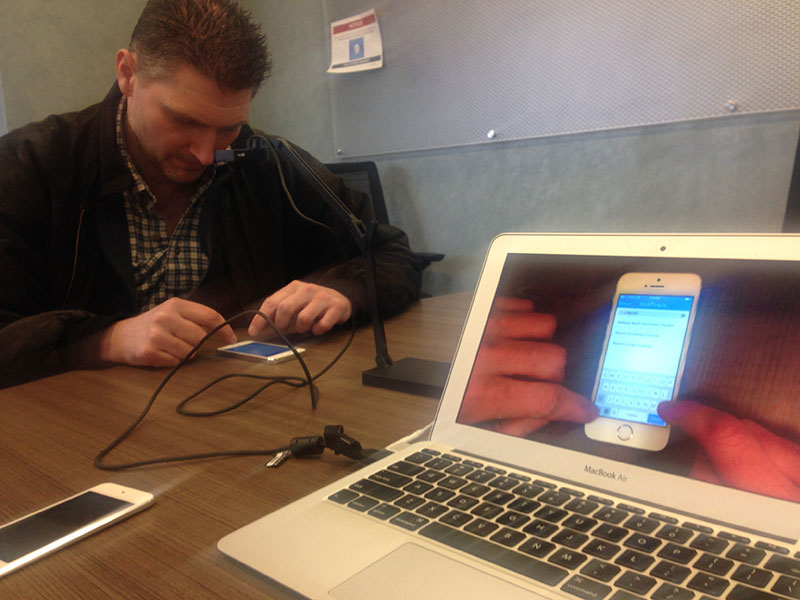
With the camera plugged into my laptop and using the included software, I could see the participant’s hands and phone full screen on my laptop. To capture the sessions, I recorded the video of my screen and the audio from the microphone on my computer using Screenflow. If you want to record a participant’s face, you can also get a separate camera to point at them, although I don’t think it’s necessary.
Meeting and prepping the participant
When the participant arrived, I’d invite them into the room and before recording, give them a general idea of who I was and what to expect during the session.
When introducing myself, I wouldn’t be totally honest. Although I’m the CEO, I introduced myself as barely part of the team. My line was usually:
You’ll be testing an app that hasn’t been released yet. The team that designed and built it asked me to show it to users before they launch it to make sure what they’ve built is something that people will understand. Because I wasn’t a part of the creation of the app, it’s important that you know that if you say that it’s great, I won’t be flattered. If you say it’s terrible, I won’t be hurt. My goal is to get your opinion, so just be honest. Then I’ll be taking the recordings and showing the team next week.
Then I usually make sure they understand that they aren’t being tested:
When I ask questions, I’m not testing you, I’m trying to understand how well the app is designed. Please remember that the goal here is to see how well the app is explaining itself. So don’t feel like you should know all the answers. If you are confused at any point and don’t know the answer, that isn’t a sign of your intelligence. It probably means the app isn’t explained well. So hearing you say “I don’t know” is a lot more valuable than you trying to come up with an answer. There are no wrong answers, and “I don’t know” is a perfectly acceptable answer in this session if that’s what you’re feeling.
Finally, I give some structure for the session:
This will last about 45-60 minutes and be very casual. The camera there will record your hands using the app. The computer will record our voices. As you use the app, I’ll be asking a bunch of questions and will also ask that you try to think out loud as much as possible. Tell me what you’re seeing, what you’re thinking, what you understand and what’s confusing. And don’t hold back, even the smallest details are exceptionally useful for the team.
Then I position their phone in the frame and say “I’m going to start recording now.”
Introducing what the test is about
This will be different for everyone, so I’ll just talk about how I did it you can modify your own way depending on what you’re testing.
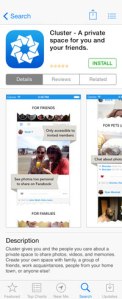
We were testing a new on-boarding flow for our iPhone app. Since the version being tested wasn’t available publicly, we installed the app onto the participant’s phone using a friend’s enterprise certificate from Apple. It was important to us for the participant to have our app on their phone because our app interacts with their photos and contacts. If you don’t need the participants to have the app on their phones, I’d recommend bringing an iPod touch in and having them use that (much easier).
Not answering questions
In the next steps, as the participant is going through your prototype, most likely they’ll ask you questions like “What does this button do?”, “Am I registered yet?”, and other basic stuff. It’s important that you don’t answer any of these questions. Remember, you don’t know. You’re just helping the team test an app you’re not that familiar with.
When asked almost anything by the subject, I responded with something like “I don’t know. How do you think it should work?”
Simulating the discovery and installation
For our simulation, I texted the participants a message saying “Hey! Check out this new app: [url]“. I told the participant “Pretend a friend sent you this message. There’s no context, just a link to the App Store.”
When the participant clicked the link, it sent them to a mock App Store page we built with a title, screenshots, and a description. It wasn’t as fully functional as the real App Store, but it worked for our purposes. On this page, I’d ask them things like:
- So what’s your initial perception of this app?
- What do you think it’d do?
- What part of this page made you think that?
There’s a surprising number of insights that come up at this point around how users evaluate apps in the App Store.
Once I feel like we learned all we could from this step, I asked them to install the app. They tap “Install” and it pulls the app from the App Store and puts it on their home screen.
In the prototype: Pre-registration
Exciting! The user is actually in the prototype. This is when the really great feedback starts flowing.
The on-boarding we tested involved a scrolling intro screen and a “Get Started” button at the bottom. I would usually have the participant spend about five minutes looking at this screen, during which I asked them:
- Talk about anything new you’re learning about the app
- Is the description different than what you remember from the App Store, and how?
- Do you have a use case for this app? What would it be?
It’s worth noting that most real users skip over these types of screens. In my opinion, that doesn’t render testing them useless because some people actually read them, and if you’re going to have one, it’s best to make sure it’s really clear.
Once I feel like we’ve exhausted the feedback coming from this screen, I tell them to move onto registration.
In the prototype: Registration
We love testing our registration page because we offer several ways of signing up (Facebook, Google, and email), and it’s great to listen to participants talk about what they are comfortable with and why. Ask things like:
- How do you normally sign up for apps?
- Why do/don’t you use Facebook?
- Is there anything you’re concerned about?
I think this is a really valuable step, and you’ll probably learn something from it.
In the prototype: First user experience
Cluster requires the user to create something right away, and we were testing a new version of this flow. It’s hard to summarize that here because it’s so specific to what’s being tested, but essentially I watched the participant go through each step and continually asked:
- Do you know what’s happening here?
- What do you think the app has done with that information?
Again, hard to generalize, but what I tried to learn is how well the app was communicating what was actually happening.
In addition, you learn a lot about button placement, confusing wording and weird user flows that made a lot of sense to your team but no sense to someone who’s never seen the app before.
Wrapping up
Even after the user created their first album on Cluster (the goal of the study), I just sat quietly to see what came out as they explored the product. In four out of five sessions the participant kept talking about stuff they liked, disliked and didn’t understand. Learnings galore.
Before ending the session, I’d ask:
- Any other thoughts about the app?
- Is this something you think you’d use?
After a couple minutes, I’d tell them that their feedback has been really helpful, and end the recording. Then I’d give them the Amazon certificate and reiterate how grateful I was for everything they shared.
Rinse and repeat
The first one will be rocky. That’s fine, they’ll get easier. So get ready for the next one. It’s going to be a long day.
Debrief Time
You now have a set of amazing feedback recorded from your participants. If the team wasn’t able to watch them live, the next step is a team debrief. The next post will cover how to pull the best insights out of what the participants have shared. For now, pack up and go relax. The hard part is over.
Please feel free to reach out to me at @mulligan on Twitter and ask any other questions in the meantime!
Image by Flickr user Phil Campbell under a CC by 2.0 license