 It wasn’t the LP albums or redesigned look that got me excited when Apple announced iTunes 9. Nope, it was the function called Home Sharing that touted the ability to share and copy media over a LAN easily. Sure, you could always drop all your music files into a centralized network share and rock out that way, but while that method works, it’s not elegant or easy for others to use.
The only problem is that Windows Home Server and the current version of iTunes 9 do not get along. It takes a little hacking to get the program installed right now, but hopefully the next release will install fine. Until then though, I got iTunes 9 to install on my WHS following some of the tips mentioned in this forum thread.
Warning: You will not be able to sync your iPod or iPhone directly to your WHS if you install iTunes 9 with this method because you have to remove the services needed for device control in order for it to install. But with Home Sharing, you can easily manage the content you want on another computer anyway. It will also cause a few pop-up error messages when your WHS starts up but it’s not like you restart your server everyday and, in my eyes, the benefits of Home Sharing outweighs the annoyance of the pop-ups.
Step one: Download iTunes
Head over here and download iTunes 9 to your WHS.
Step two: Download and install Orca
We’re going to use this program to edit the iTunes installer.
Step three: Download and install WinRAR
You probably already have WinRAR installed, but if not, it’s available here. Install it.
Step four: Extract the iTunes installer
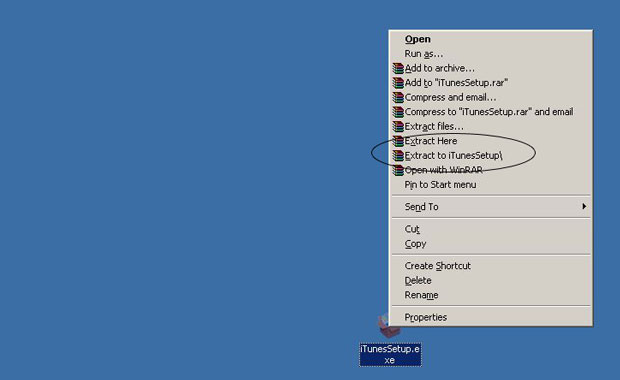
- Right click on iTunesSetup.exe (the first file you download)
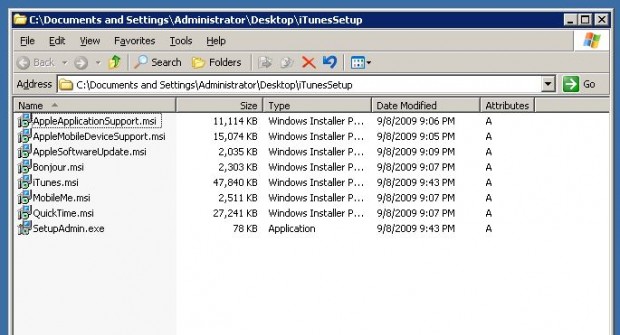
- Click “Extract To iTunesSetup\” to make a folder with all the contents of the installer
Step five: Edit iTunes.msi
- Open up Orca
- Open up the newly-created iTunes.msi file within Orca
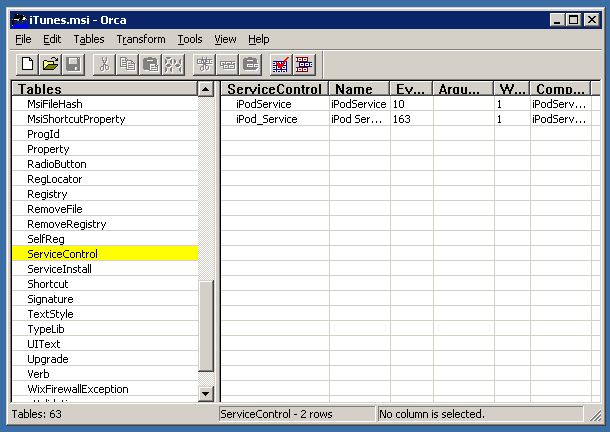
- Select ServiceControl in the left column
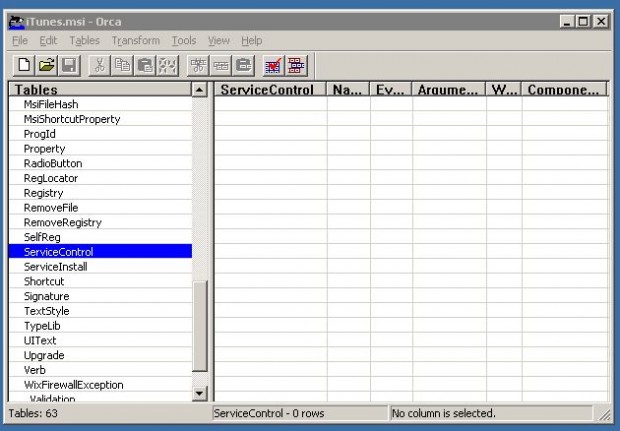
- Select each one of the files within the ServiceControl table and hit the Delete key on the keyboard
- Save and close the file
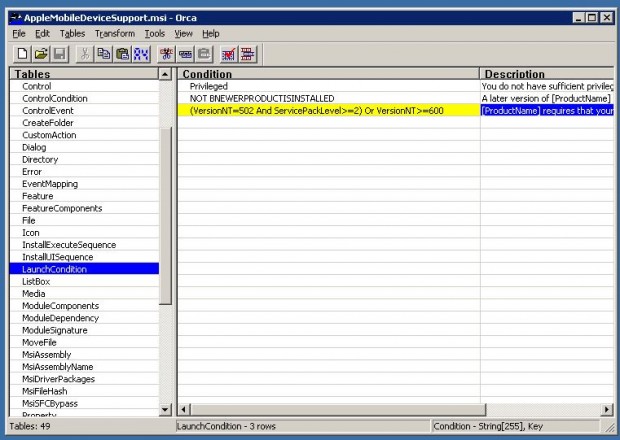
Step six: Edit AppleMobileDeviceSupport.msi
- Open AppleMobileDeviceSupport.msi in Orca
- Select LaunchCondition from the left column
- Change the number 501 to 502 in the appropriate condition on the right.
- Save and close that file
Step seven: Install iTunes 9
- Double click on the modified iTunes.msi file. NOT on the original installer
- Click through the prompts to install as normal
- It might give you a Quicktime error, in which case you’ll have to go back and install Quicktime.msi afterwards
That’s it. It’s really not that bad of a hack. But once again, you will get errors relating to the iPod when your Windows Home Server restarts and you will not be able to sync your iDevice with the WHS. Uninstalling iTunes 9 does get rid of these messages so hopefully iTunes 9.0.1 will fix these issues. But until then, enjoy the Home Sharing function. It’s great.
If anyone has a better method, drop it in the comments below.
