 When I say things like this, my friends roll their eyes, but it’s how I actually talk. I say things like, “Let’s talk about video compression!” They buy another drink. But that’s what we’re doing in today’s Help-Key, and it’s something I actually get to do for a living (besides blogging, duh).
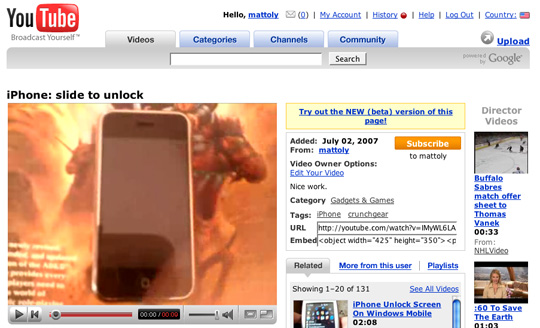
YouTube is getting huge. Somehow, despite the lack of a coherent business model, it’s become one of the most popular destinations on the Internet, and rightly so: the idea that anyone can become some sort of memestar by uploading a simple video is great. And because the site does its own Flash conversion, it’s a piece of cake. The thing is, though, with digital video garbage in means garbage out.
You may have noticed that some videos on YouTube simply look better than others. This is because they came from better sources. With a little tweaking and a little know-how, you can prepare your video for YouTube in a way that spares us all from oversized pixels.
The first step is knowing what format you’re starting with. Most digital cameras today shoot video, as do most phones, which is a great cheap way to start. Sadly, the videos created tend to be worse than that 3rd-gen VHS copy of Cheerleader Carwash 8 you found under your brother’s bed. If you can, pull your video from a digital camcorder. Most Mini-DV cameras include Firewire out, so if you’ve got a fairly recent Mac you’re set. Or you can get a Firewire card for your Peecee pretty cheap.
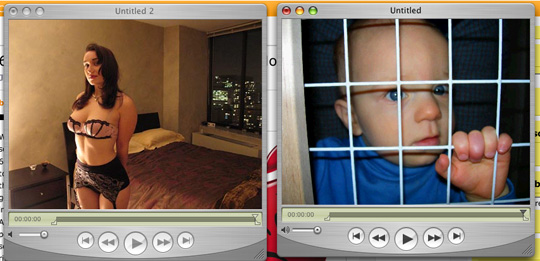 But no matter where your video comes from, the onus is on you to make it awesome. There are plenty of editing tools on the Internet for any platform you wish, and the latest computers actually have tools bundled with the basic install for just such casual editing. And they’re easier to use than you think. You’re not Kubrick, so you don’t need Final Cut Pro or Premiere. I personally use the $30 pro version of Quicktime, because it’s fast and has drag-n-drop editing, which is nice.
If you can avoid it, don’t use the Windows Movie Maker. The program handles things with tricky Windows Media codecs and black magic and the blood of virgins. Also, if you’re using a cellphone video source, it’ll vomit on you. Quicktime plays nice with about anything, and the pro version can be had on any PC or Mac.
 Once you’ve got your clip looking pro, you’re going to want to make it YouTube ready. YouTube can only take certain formats for input, so this is where it gets tricky. You’ll want to make a .mov or .mp4, so make sure whatever editor you’re using can hack it. If not, you’ll need to do a conversion, and that’s no rock n’ roll fun, and you lose information during the transition, so best just leave it alone.
Your newly formed video should be set to the YouTube-native size of 320×240 (aka QVGA). I know, I know: here we are in the world of HiDef, and I’m telling you to shrink your vids. I’m just the messenger, ya know?
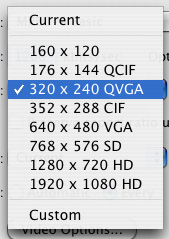 It’s also worth noting that your camera might shoot at a different aspect ration than the 4:3 that is 320×240. If so, you’ll have to do a little letterboxing. It does king of suck, but it’s better than the stretch and pull method that would happen otherwise.
When YouTube’s servers encode your video, it’s going to lose some quality, it’s a fact of streaming media. That means you’re going to want to make it as bit-rich as you can. Use a bitrate as high as you can, YouTube can take it. That being said, anything above 1200kbps is probably overkill and will take the video longer to process on YouTube’s end. Somewhere between 700kbps and 1000kbps should do the trick nicely.
 Now that we’ve got size, codec, and quality set up, choose your audio. You’ll want to use the MP3 audio codec (either CBR of VBR), which should be standard on your editor.
Output your file as a .mov or .mp4 and preview it. It should look pretty good (if small). If you’re satisfied, do your upload. After it’s on the servers, it can take up to an hour or more to display. This is because YouTube is formatting it and encoding it for their Flash streaming. It’s an automated process, but by following the guide above, it makes less work for the YouTube servers. This isn’t altruistic, however: you did some of their work for them, but since you were in control, you made it better than they could. This means that your video will look better than most, and will encode faster. Double bonus, pal.
Test it out and tell us what you think. If you’ve got some other tips, feel free to share them in the comments thread for this story. Also note that there’s software out there that has automated YouTube features, such as VirtualDub. These programs are great time-savers if you’re and hardcore YouTuber, and they should be considered.
Enjoy, readers, and we’ll see you on our screens soon.