Editor’s Note: Brenden Mulligan is a co-founder and designer at Cluster, and previously created Onesheet, MorningPics, ArtistData, and others. Find him on Twitter @mulligan.
At Cluster, we’re big fans of iteration and experimentation. Since we launched publicly in February 2013, we have rapidly iterated the product on both iOS and Android. In the first eight weeks of being live in the Apple App Store, we launched 10 updates. On Android, there was a week that we pushed out five releases in five days while we did some heavy A/B testing.
While rapid iteration is wonderful, at times we also slow down and make more deliberate decisions about larger changes. When this happens, we tend to make rapid prototypes and then test them in front of different groups. Most of these tests are fairly informal, but occasionally (admittedly not often enough) we run full-blown user testing where we recruit and bring in potential users to walk through the app and give us feedback.
We are working on a big update, so we recently ran multiple sessions for different prototypes. When talking about it with fellow entrepreneurs, they asked us for details. Here is our ever-evolving playbook.
Because this is fairly lengthy, this will be the first of three parts:
- Setup
- Running the Tests
- Debriefing
Before getting started, I want to give a huge amount of thanks to Michael Margolis and the Google Ventures design team, who taught us most of these techniques.
Part 1: Setup
User tests are extremely valuable and require a lot of work to get set up. It takes a significant amount of one person’s time over the course of a week to set up the tests and run them well. So make time to do it correctly.
The setup process is divided into the following sections:
- Decide on a specific thing to test
- Decide when and where to do the user study
- Decide what type of users to study
- Recruit users with Craigslist
- Trim the candidates list
- Prioritize and schedule
- Get the right equipment
Decide on a specific thing to test
We were recently lucky enough to do a sprint with the exceptionally talented design team from Google Ventures (entire post on that coming soon). Over the course of five days, we identified core opportunities with Cluster, brainstormed improvements, built several simple prototypes, and tested the prototypes with potential users. The result of this process was a clear idea of what new concepts were working and which weren’t.
With the list of successful ideas, the team then rapidly built a single functional prototype based off our current app. With this working prototype completed, it was time to show it to users and see if all the insights gathered from the design sprint worked in the context of our actual app.
Decide when and where to do the user study
I was scheduled to be spending a week in Nashville, which gave us a great opportunity to run our test outside of the Bay Area. This is incredibly valuable because the Bay Area tends to be filled with tech-savvy, early adopters. Nashville has its fair share of them, but technology isn’t as core to the community there, so we felt like this would give us an opportunity to meet more “real” users.
It’s also important to pick a quiet, private, and neutral place. As tempting as it might be to use your company’s conference room, I’d recommend not bringing users into the corporate office. Use a friend’s office or co-working space. All advice we’ve been given is the more neutral the location, the better.
The privacy and quietness is important because you’ll be recording the session, so you don’t want to do it in a coffee shop where there’s a lot of distraction and background noise.
When I was in Nashville, I rented a conference room from the Entrepreneur Center. It worked out perfectly.

Nashville Entrepreneur Center
Decide what type of users to study
This is a very important part of the process. Before recruiting users, you need to decide what type of people you want to meet with. We had done this during the Google sprint, and because our app involves sharing photos, we asked these types of questions:
- What type of phone should they have?
- How involved with social media should they be?
- What apps should they use (and not use)?
- How many photos should they take per week?
- How old are they?
- How do they share photos currently?
With these questions in mind, we created a Google Forms survey that would help us clearly identify whether the potential tester fit our target profile. It’s not worth user testing if you’re not testing the right type of user, so take some time and do this step properly.
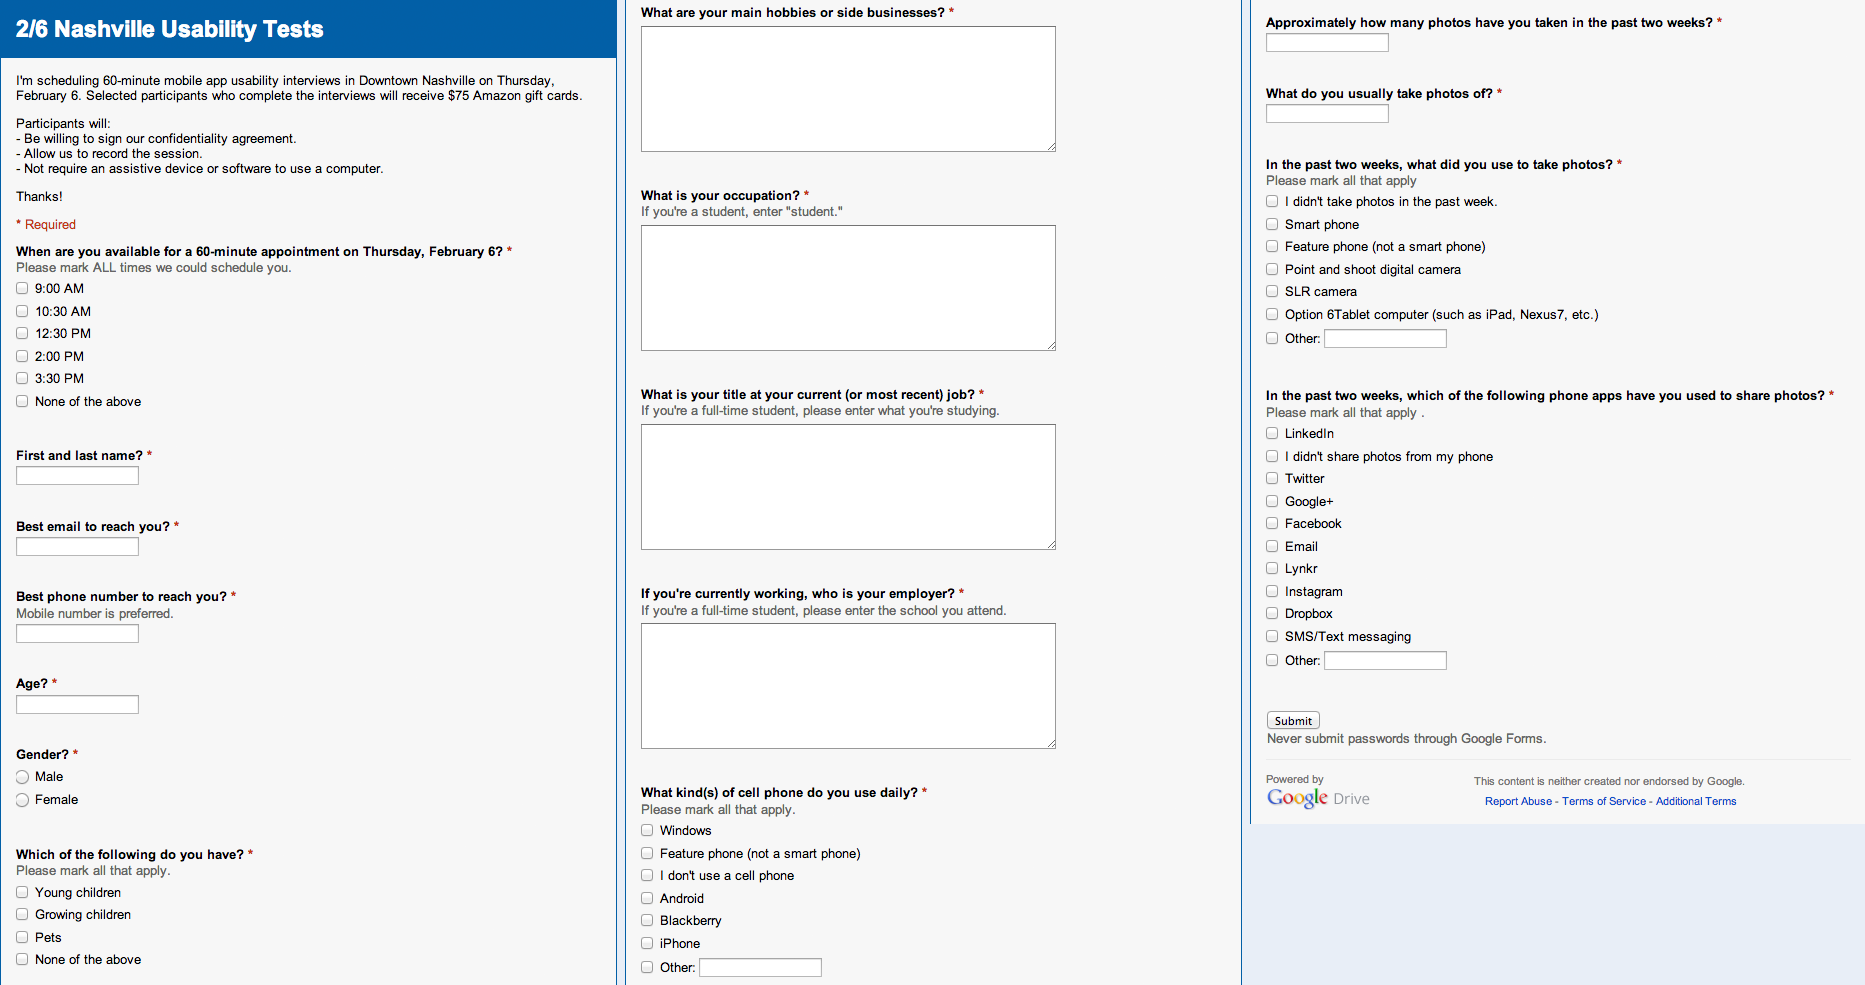
The actual screener we used for our Nashville study (click to enlarge)
Since the user is going to have to physically be somewhere, it’s also useful to get their availability. We did that by starting with the question saying “Which of the following times are you available on Thursday February 6 to come to downtown Nashville?” with five options for time slots.
Recruit users with Craigslist
About a week before we planned to do the user testing, we posted a job opportunity to the jobs/et-cetera section of Craigslist. In this relatively short post, we give very little information, except that we were looking for people to participate in a usability study, they’ll need to be okay signing an NDA and being filmed, and we were willing to pay them for their time (in this case, a $75 Amazon gift card for a 60-minute meeting).
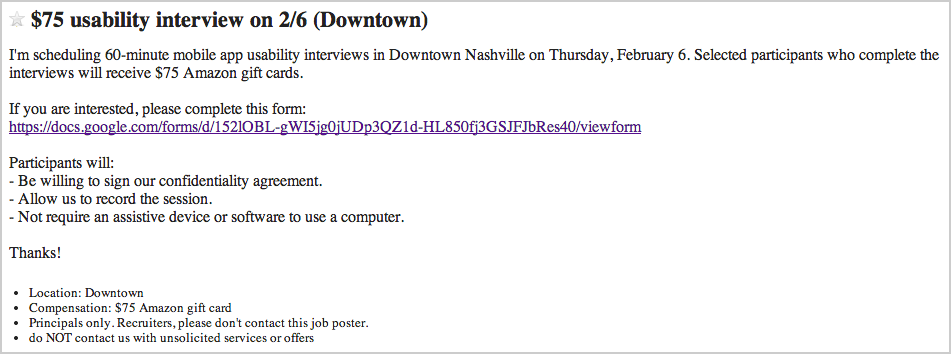
Craigslist post driving people to the screener
The post did not let users email-reply. Instead, there was a link to a Google form we built above. That made it super easy for us to consolidate and organize everyone’s responses.
Trim the candidates list
Usually, we’ll get between 60-200 applicants within a few days. We try to pare that down to five. This happens over several rounds of editing.
For this study, the first big cuts happened with device type. Because of the small amount of time we had to build the prototype, we only could test with iPhone users that had iOS 7 installed, and ideally one of the iPhone 5 models because we didn’t have time to optimize for all screen sizes. Although this skewed the users a bit, we were able to rebalance it by looking at the other info.

Example responses from the Nashville screener, with all personal information removed (click to enlarge)
We then eliminated anyone who didn’t take photos with their phones. Although it might be interesting to talk to these users eventually, we were looking for people who would have an immediate reason to use our app. If they didn’t take photos, it was unlikely they’d be the type of user we wanted anyway.
Prioritize and schedule
With the remaining candidates, we looked at their age, occupation, and a couple other data points and put together a prioritized list of the people we were most interested in talking to. At this point it became a scheduling exercise, slotting our top pick for each time slot and choosing a backup if that person couldn’t make it.
Each candidate was emailed saying they’d been selected for a time slot and they needed to write back within a certain time frame to confirm, or their slot would be given away. The backup list was emailed saying they were on the backup list and to let us know if they no longer could make it if picked, otherwise they would hear by a certain time if they were needed.

Moving candidates around while scheduling
As a warning, people are very flaky. Out of the five top candidates, only three confirmed, and one of them cancelled the day of. It wasn’t a problem because we were able to fill in the slots with our backups, but it’s a bigger pain that you’d expect. It’s even wise to have multiple backups just in case.
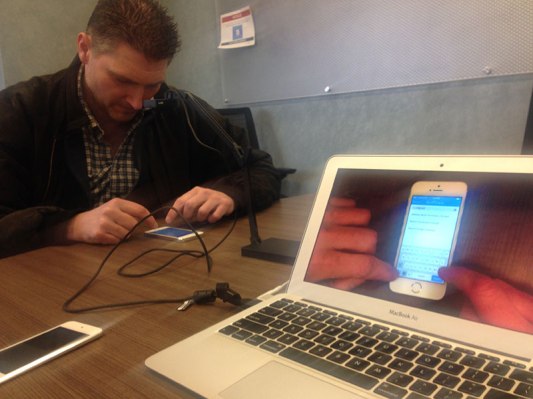
Get the right equipment and software
We were testing a mobile app, so it was important to record the user actually using the app. Although you can do this by plugging the app in and watching a screencast on the computer, it’s much better to actually see them touching their phone. We purchased a $100 camera for this, and it’s well worth the investment.

IPEVO Ziggi-HD High-Definition USB Document Camera
The only other thing you’ll need is a way to record the audio and video of the session to your computer. For this, I recommend an excellent app called Screenflow.
Now it’s time to test
You’ve got the goals, the users, and the equipment. Now it’s time to show up and run the tests! The next post will cover setting up the room and running the tests with live users.
Please feel free to reach out to me at @mulligan on Twitter and ask any other questions in the meantime.